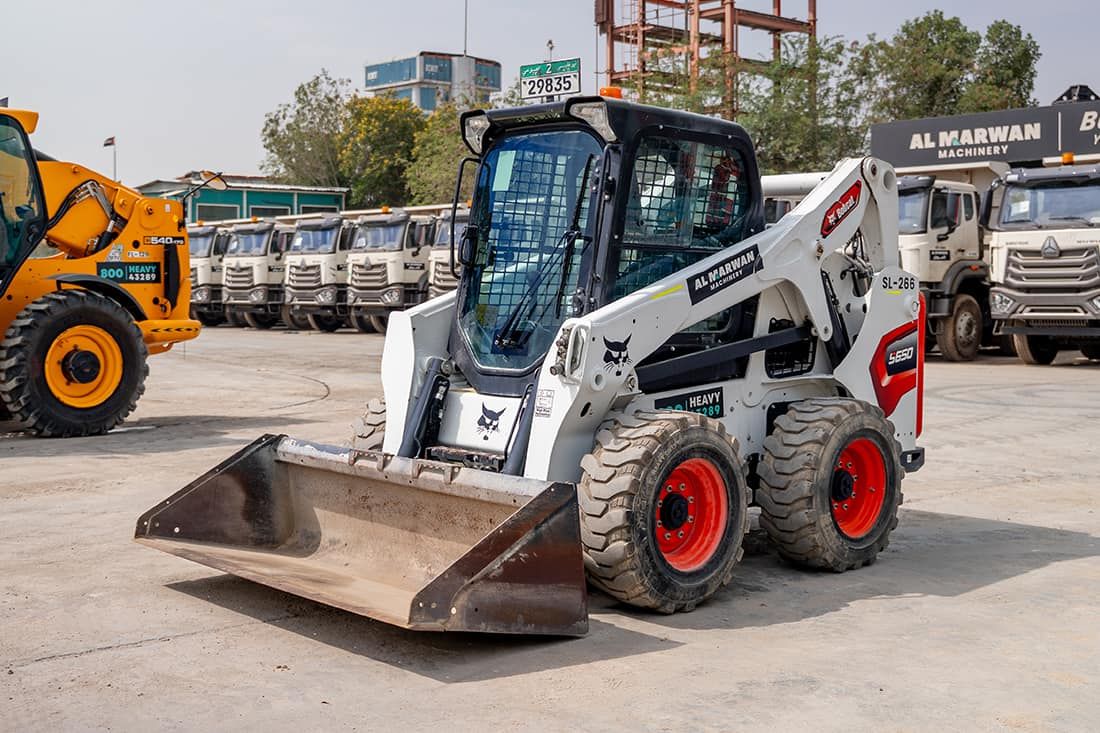
A skid steer loader is the most attachment-versatile machine on a site and the easiest one to underestimate. It is small, quick to learn, and forgiving in open ground — which is exactly why the injury record is as bad as it is. Most skid steer fatalities are not caused by difficult operation; they are caused by bypassed interlocks, missing seat belts, and people standing where a lift arm is about to be. This guide covers machine types, control patterns, load capacity, operating technique, attachments, and the safety systems that exist for a reason.
What Is a Skid Steer Loader and How Does It Work
A skid steer loader is a compact, rigid-frame machine with lift arms mounted at the rear and an attachment coupler at the front. It has no steering axle. Each side’s wheels are driven independently, and the machine turns by driving one side faster than the other — or in opposite directions — so the tyres skid across the ground. That is where the name comes from, and it explains both the machine’s biggest advantage and its main limitation.
The advantage is manoeuvrability: a skid steer can spin within its own footprint, which is why it dominates confined-site work, demolition interiors, landscaping, and yard operations. The limitation is surface damage and tyre wear — skidding is inherently abrasive, and on turf, asphalt, or finished concrete it leaves marks.
Compact track loaders (CTLs) are the tracked equivalent, using rubber tracks instead of wheels. They spread weight over a larger area, float better on soft ground, and cause less surface scuffing, but they cost more to run and have a different stability rating (covered below).
Lift geometry divides the category further. Radial lift machines move the attachment through an arc, giving best reach at mid-height — good for digging, backfilling, and general loader work. Vertical lift machines keep the attachment closer to vertical through the travel, giving more reach at full height — better for truck loading and pallet handling.
The brand name “Bobcat” is often used generically for the whole category, in the same way that other trademarks have become shorthand for their product type. The operating principles below apply to any manufacturer’s machine.
Skid Steer Control Patterns Explained: ISO, H-Pattern, and Hand-Foot
Identifying which pattern a machine uses is the first thing you do before starting it. Get this wrong and your first input will be the wrong one.
Three layouts dominate. In the standard (hand-foot) pattern, dual steering levers control drive functions and dual foot pedals control lift and tilt. In the H-pattern, dual levers control drive while hinging or pivoting the handles controls lift and tilt. In the ISO pattern, the left joystick controls drive functions and the right joystick controls lift and tilt.[1]
Under H-pattern specifically, forward and backward movement of the left joystick drives the left-side wheels while side-to-side movement controls lift; forward and backward on the right joystick drives the right-side wheels while side-to-side controls tilt.[2] In other words, H-pattern splits the machine down the middle — each hand owns one side of the drivetrain plus one loader function. ISO splits it by task — one hand drives, one hand works.
Hand-foot controls were the original layout and remain common on older machines, including earlier Bobcat models; ISO joystick control is standard on most modern machines.[3]
Many current machines offer selectable joystick control, letting the operator switch between ISO and H-pattern from the cab. Before running an unfamiliar model, check the manual or the in-cab control schematic to confirm which pattern is active — this matters especially on rental machines, where the pattern may have been changed by the previous operator.[4]
Joystick controls also reduce fatigue: they replace the longer-throw shoulder, arm, and ankle movements of mechanical linkages with shorter, lower-effort hand and wrist movements.[2] Operators used to pedals typically need a few days to adapt to joystick sensitivity.[5]
Whichever pattern you use, learn one and stay on it while you build muscle memory. Alternating between patterns during the learning phase is how new operators end up driving a lift arm into something.
Skid Steer Safety Systems and Why They Matter
This section is not boilerplate. The safety systems on a skid steer are the difference between a near miss and a fatality, and the accident data is unambiguous about what goes wrong.
The machine’s “zone of protection” comprises the rollover protective structure (ROPS), falling object protective structure (FOPS), side screens, and an operator restraint. ROPS protects during an overturn; FOPS protects against objects falling onto the cab; side screens prevent the operator from being caught between the lift arms and the frame and stop protruding objects from striking the operator; and the seat belt or seat-bar restraint keeps the operator in the seat.[6]
Interlocked controls require a non-operational fixture — a seat belt or restraint bar — to be secured before the operational controls will function. Some machines link the lift arm control to the seat belt, others to a bar lowered in front of the operator or a pressure switch in the seat.[7] On modern machines the controls stay locked after the engine starts until the operator sits, fastens the belt, and lowers the restraint bar, at which point the controls are enabled via a hydraulic enable switch or parking brake control.[3]
Now the part that matters. Analysis of skid steer fatalities identifies the leading contributory factors as bypassing safety interlock components, failure to wear a seat belt, lack of hazardous energy control — specifically not using the lift-arm safety bar — and non-functioning backup alarms. The incident types cluster around people working near the machine, maintenance and repair, mounting and dismounting attachments, entering and exiting the machine, troubleshooting, passengers riding in the bucket, and fork attachment errors. Entrapment occurs when a load rolls or drops into the operator compartment; crushing occurs when an operator or helper is caught between an attachment and the machine frame.[8]
Two practical conclusions follow. First, never bypass an interlock, for any reason, including “it’s only a short move.” Second, never enter the lift arm path without the mechanical lift-arm support engaged — hydraulic pressure is not a restraint.
A skid steer can tip forward from excessive bucket weight or from a heavy raised attachment, and a forward tip can throw an unrestrained operator out of the protective structure, allowing the machine to run them over or the bucket and load to crush them.[9] The seat belt is not there for rollovers alone.
Understanding Rated Operating Capacity and Tipping Load
Two numbers govern what a skid steer can safely lift, and confusing them is a common and dangerous mistake.
- Tipping load is the maximum weight the machine can theoretically handle before losing stability, determined under standardised conditions — level ground, machine stationary, lift arms at a specified position.[10] More precisely, it is the full-turn static tipping load: the point at which the rear wheels lift off the ground with the arms fully extended.[11] It is a test figure, not a working target.
- Rated operating capacity (ROC) is a fraction of the tipping load — typically 50% for wheeled skid steers and 35–40% for tracked machines. Those percentages exist to absorb bumps, slopes, and real working conditions that the static test does not represent.[12] The stricter tracked-machine standard reflects different stability behaviour: a wheeled machine with a 4,800 lb tipping load carries a 2,400 lb ROC at 50%, while a tracked model is rated at around 35%.[13]
Three things operators routinely get wrong:
- The attachment counts against capacity. Buckets, forks, and grapples all reduce usable lift capacity — usable capacity is ROC minus attachment weight.[10] A heavy attachment such as a grapple or mulcher eats significantly into what you can safely move, while lighter pallet forks leave more for the load itself. A mid-size machine with a 2,700 lb ROC and a 700 lb bucket has around 2,000 lb of usable capacity — and on soft ground without counterweights, practical safe lifting is lower still.[14]
- Loose material has to be weighed, not eyeballed. Weigh discrete loads directly; for loose material, multiply bucket volume by material density. Keeping material weight at 80–90% of usable lift capacity leaves margin for uneven terrain.[10] Wet sand and wet aggregate are far heavier than the dry equivalents, and a bucket sized for one is overloaded with the other.
- Stability changes as the arms rise. A loader can feel entirely stable with the load low and become unstable when the arms rise, the machine turns, the ground slopes, or the load shifts forward.[15] The feel of the machine at ground level tells you nothing about what happens at full height.
Skid Steer Pre-Start Inspection Checklist
Walk around before every shift:
- Tyres or tracks. Check pressure, cuts, and tread on wheeled machines; on CTLs check track tension, missing lugs, and undercarriage roller condition. Uneven tyre pressure across the machine affects lift geometry and stability.
- Attachment coupler. Confirm the quick-attach locking pins are fully engaged and visible through the attachment plate. A partially engaged coupler releases the attachment under load, and this is one of the most common incident causes on these machines.
- Lift arms, cylinders, and pins. Look for cracks, bent linkage, leaking cylinders, and worn or missing pin retainers. Check hose routing for chafe points.
- Safety systems. Verify the seat belt latches, the restraint bar operates and locks the controls when raised, side screens are in place and undamaged, the backup alarm sounds, the horn works, and the lift-arm support bar is present.
- Fluids. Engine oil, coolant, hydraulic reservoir, and fuel, with the machine level and the arms fully down. Check for leaks under the machine and around the auxiliary hydraulic couplers.
- Cab access. Confirm steps and grab handles are clean. Most skid steers are entered over the attachment, so a wet or muddy bucket edge is a fall hazard.
- Auxiliary hydraulics. If running a hydraulic attachment, check the couplers for damage and confirm they are fully seated and depressurised before connecting.
- Inspection of the safety interlock devices should be routine, and any willful bypass or disregard of them should not be tolerated.[8]
Starting Up and Basic Operation
Enter the machine facing it, using the handholds — over the attachment with the arms fully lowered and the attachment flat on the ground. Never enter or exit under raised arms.
Sit, fasten the seat belt, lower the restraint bar, and only then enable the controls. Start the engine at low throttle, let hydraulic oil warm before working, and cycle lift and tilt through their full range unloaded while listening for cavitation and watching for drift.
- Driving. Push both drive controls forward to travel forward, both back to reverse, one alone to turn, opposing inputs to counter-rotate. Move in small increments at first — skid steers are far more responsive than their size suggests, and pilot or electro-hydraulic controls are more sensitive than mechanical linkages.
- Travel with the bucket low. Keeping the bucket low while travelling improves stability, and jerky movements increase tipping risk.[14] Carry the attachment just high enough to clear obstacles — roughly 200–300 mm — and no higher. A raised load moves the centre of gravity up and forward, which is the tip-forward condition.
- Minimise skidding on finished surfaces. Counter-rotating on asphalt, turf, or concrete scuffs the surface and wears tyres rapidly. Use wider, gentler turns while moving where the space allows.
- Ascend and descend with the heavy end uphill. Loaded, that means the attachment faces uphill; unloaded, the counterweight end does. Travel straight up and down slopes, never across, and keep the load as low as the ground allows.
- Loading and Digging Technique
- Filling the bucket. Approach the pile square with the bucket flat on the ground and the cutting edge slightly down. Drive in with steady forward pressure while gradually curling the bucket back. Do not ram the pile at speed — momentum loading stresses the loader arms and lifts the rear wheels. If the machine stalls or the wheels start spinning, back off, reset, and take a shallower bite.
- Lifting. Raise smoothly with the bucket curled fully back so material cannot spill toward the operator compartment. Bulky material that does not fit the bucket properly can roll back into the operator station, and smaller objects such as stones or pavers can enter the compartment even with a protective structure in place.[9]
- Truck loading. Approach with the arms raised only at the last moment, stop square to the truck, then raise and dump. Lower the arms fully before reversing away. This is the highest-risk moment for a forward tip, since the load is at maximum height and reach simultaneously.
- Grading and levelling. Set the bucket flat, reverse-drag material toward you with slight down pressure, and make several light passes rather than one heavy one. Grading forward pushes material into a windrow; grading backward spreads it evenly. Keep constant travel speed — most grading defects come from speed variation, not from bucket angle.
- Backfilling. Push material with the bucket flat and low, working in layers. Avoid using the bucket corners to push, which twists the loader arms.
Working with Skid Steer Attachments
Attachment versatility is the reason to own the machine, and attachment changes are a documented injury point. Mounting and dismounting attachments appears repeatedly in skid steer incident data.[8]
- Changing attachments safely: lower the arms and rest the attachment flat on level ground, release the coupler with the machine running only if the manufacturer’s procedure requires it, then shut down and exit before going near the front of the machine. The safe method of securing an attachment is to turn the machine off, exit properly, and secure the locking levers by hand.[6] Confirm both locking pins are fully through the attachment plate before lifting — a visual check, every time.
- Hydraulic attachments need the auxiliary flow rating matched to the attachment’s requirement. Standard flow and high flow are different circuits; running a high-flow attachment on standard flow gives poor performance, while the reverse can damage the attachment. Relieve residual pressure before connecting or disconnecting couplers.
- Weight and balance. Every attachment changes the machine’s centre of gravity and reduces usable capacity. Heavy attachments such as mulchers, breakers, and grapples may require counterweight to restore stability, and they narrow the safe operating envelope considerably.
- Never use the bucket or forks to lift or transport people. Passengers riding or standing in the bucket appear directly in the skid steer incident record.[8]
Parking and Shutdown Procedure
Park on level ground where possible. Lower the lift arms fully and rest the attachment flat on the ground — never leave the arms suspended on hydraulic pressure. Reduce to idle, allow the engine a short cool-down after heavy work, then shut off.
Engage the parking brake, raise the restraint bar, release the seat belt, and exit facing the machine using the handholds. Remove the key.
If the machine must be left on a slope, chock the wheels or tracks and turn the attachment into the slope.
Common Skid Steer Operating Mistakes
- Bypassing interlocks. The single most consistent factor in skid steer fatalities.[8] If an interlock is faulty, the machine goes out of service — it does not get jumpered.
- Skipping the seat belt. The restraint bar alone is not sufficient. Both exist, and both are used.
- Working under raised arms without the support bar engaged. Hoses fail and valves leak. The mechanical support is the only thing that does not.
- Travelling with the load high. Raises the centre of gravity exactly when you have the least control.
- Exceeding ROC because “it lifted it fine.” The machine will lift beyond ROC. That is precisely the problem — capacity limits are about stability under real conditions, not about whether the hydraulics can manage the weight.
- Not confirming coupler engagement. A dropped attachment at height is an uncontrolled falling load.
- Turning sharply on a slope. Combines lateral load transfer with a skid-based turn on a surface that already reduces traction.
- Ignoring bystanders. Running over bystanders is a recurring skid steer incident type.[8] The machine has significant blind spots to the rear and sides, and it moves faster than people expect. Establish exclusion zones and make eye contact before moving.
Best Practices for Efficient Skid Steer Operation
Match the machine to the surface. On soft ground, turf, or anywhere surface finish matters, a compact track loader will outwork a wheeled skid steer and do less damage — the higher running cost is often cheaper than the reinstatement.
Match lift geometry to the task. Radial lift for digging and general loader work; vertical lift for pallet handling and loading over the side of a truck.
Plan travel paths to minimise reversing and sharp turns. Cycle time on a skid steer is dominated by manoeuvring, not by loader function speed, so a layout that lets you work in a smooth loop beats one requiring repeated three-point turns.
Keep tyre pressures even and correct. Uneven pressures skew the machine and accelerate tyre wear on a machine that already scrubs tyres hard.
Train operators specifically in hazardous energy control, front and rear axle weight distribution, centre-of-gravity behaviour, rated operating capacity principles, and the machine’s safety symbols[8] — not just in how to drive it. The controls are the easy part; the stability envelope is what actually determines whether an operator is competent.
Frequently Asked Questions About Operating a Skid Steer Loader
How long does it take to learn to operate a skid steer? The basics of starting, driving, and operating attachments can be picked up in a few hours of training, with proficiency following practice.[1] Competence with capacity limits, slopes, and attachments takes considerably longer than competence with the controls.
What is the difference between ISO and H-pattern controls? Under ISO, the left joystick drives and the right joystick works lift and tilt. Under H-pattern, each joystick drives one side of the machine, with lift and tilt on the side-to-side axes.[1] Many machines let you switch between them from the cab, so always confirm which is active before operating.[4]
What is rated operating capacity? A safety-reduced fraction of tipping load — typically 50% for wheeled skid steers and 35–40% for tracked machines — and the figure you should always work within. Tipping load is never a target.[12]
Does the attachment reduce lifting capacity? Yes. Usable capacity is ROC minus the attachment’s weight.[10]
Why do tracked loaders have a lower capacity percentage? Tracked machines follow a stricter standard, commonly 35% of tipping load against 50% for wheeled machines[13], reflecting their different stability characteristics and the ground conditions they typically work on.
Can someone ride in the bucket? No. Passengers riding or standing in the bucket is a documented cause of skid steer injuries and deaths.[8]
Why can’t I bypass the seat bar interlock for a quick move? Bypassing interlock components is among the leading contributory factors in skid steer fatalities.[8] A forward tip can eject an unrestrained operator from the protective structure into the path of the machine or its load.[9]
References
- “How to Operate a Skid Steer: Tips on Driving, Grading and More.” United Rentals. https://www.unitedrentals.com/project-uptime/equipment/how-operate-skid-steer-tips-driving-grading-and-more
- “Changing Demographics Call for Loader Control Considerations.” Construction Business Owner. https://www.constructionbusinessowner.com/fleet/changing-demographics-call-loader-control-considerations
- “How To Operate a Skid Steer: A Step-by-Step Guide.” BigRentz, 2026. https://www.bigrentz.com/blog/how-to-operate-skid-steer
- “Skid Steer Loader Controls Explained.” SkidSteerLoader.org, 2025. https://skidsteerloader.org/skid-steer-loader-controls-explained-master-your-machine-in-days/
- “Skid Steer Controls: Hand & Foot vs. Joysticks (ISO & H-Pattern).” Iron Power Industries, 2026. https://ironpowerindustries.com/joysticks-hand-foot-or/
- “Skid Steer Safety.” Safety, Health and Wellness in Agriculture (eXtension), 2025. https://ag-safety.extension.org/skid-steer-safety/
- National Institute for Occupational Safety and Health. Preventing Injuries and Deaths from Skid Steer Loaders. https://www.cdc.gov/niosh/docs/98-117/default.html
- “Skid-Steer Loaders: Hazard Awareness and Recommended Safety Practices.” Incident Prevention, 2024. https://incident-prevention.com/blog/skid-steer-loaders-hazard-awareness-and-recommended-safety-practices/
- “Skid-Steer Safety for Farm and Landscape.” Penn State Extension. https://extension.psu.edu/skid-steer-safety-for-farm-and-landscape
- “Skid Loader Lift Capacity: ROC, Tipping Load & Performance.” SANY Group, 2025. https://www.sanyglobal.com/blog/skid-loader-lift-capacity/
- “Understanding Rated Operating Capacity for Skid Steers.” Gregory Poole, 2025. https://www.gregorypoole.com/operating-capacity-skid-steers/
- “What Is Tipping Load on a Skid Steer vs. a Track Loader?” White Star Machinery, 2025. https://whitestarmachinery.com/knowledge-center/what-is-tipping-load-on-a-skid-steer-vs-a-track-loader/
- “Skid Steer Lift Capacity Explained: Key Factors.” SkidPro, 2025. https://skidpro.com/skid-steers-lift-capacity/
- “Mini Skid Steer Lift Capacity: What ROC and Tipping Load Really Mean.” Huaying Machinery, 2026. https://huayingmachinery.com/mini-skid-steer-lift-capacity-guide/