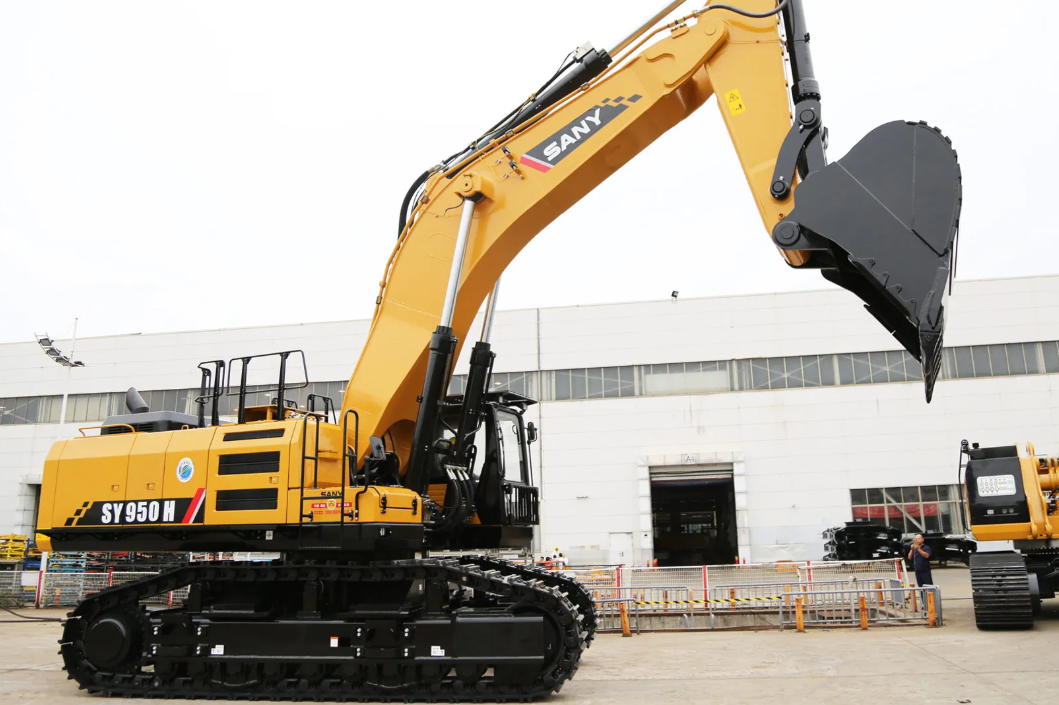
An excavator is the most versatile machine on a construction site and the one where the gap between a competent operator and an unsafe one shows up fastest. The controls can be grasped in an afternoon; the judgement — reading ground conditions, managing the slew radius, keeping the machine’s centre of gravity where it belongs — takes months. This guide covers excavator components, control patterns, the digging cycle, safety requirements, and the mistakes that cost the most money.
Excavator Parts and Components Explained
An excavator divides into three functional groups, and thinking about it this way makes the controls intuitive rather than memorised.
- The undercarriage carries the machine: travel motors, final drives, sprockets, idlers, track rollers, and either rubber or steel tracks — or, on wheeled machines, tyres and outriggers. It does nothing but move the machine and provide a stable base.
- The house, or upper structure, sits on a slew bearing and rotates a full 360°. It carries the engine, hydraulic pumps, main control valve, counterweight, and cab. Slew is the source of most beginner accidents, because the counterweight swings out behind you at the same moment the boom swings in front of you.
- The front linkage is the working end: boom, stick (also called the dipper or arm), and bucket, each driven by its own hydraulic cylinder. Bucket capacity determines how much material moves per cycle, and matching bucket size to material density is one of the cheapest productivity gains available.
Everything runs on a closed hydraulic circuit — variable displacement pumps feeding a main control valve that meters oil to the cylinders and motors. That is why hydraulic oil level and temperature matter more on an excavator than on almost any other machine.
Excavator Operator Training and Certification Requirements
Operating an excavator on a commercial site is not something to learn informally. Working without proper certification is unlawful in most jurisdictions and carries serious liability, and formal training followed by a recognised competency assessment is required before an operator can legally run the machine.[1]
Certification schemes vary by country — national competency cards, employer-verified assessments, or licences issued by a transport or municipal authority are all common — but the substance is the same everywhere: documented theory training, supervised seat time, and a practical assessment on the machine class you intend to operate. Certification is also tied to machine class. A card covering compact machines does not automatically cover a 50-tonne excavator.
Beyond the paperwork there is a competence question. Basic proficiency — trenching in cooperative ground, loading a truck, tidy backfill — typically comes within a few months of regular seat time. Confidence on slopes, in confined spaces, or around live services takes considerably longer.[1]
Excavator Pre-Start Inspection Checklist
Do this before every shift, on foot, before you climb in. It takes four minutes and prevents most in-service failures.
- Undercarriage. Check track tension and look for missing or cracked pads, worn sprocket teeth, and oil weeping from final drives or idler seals. Look underneath for fresh puddles and identify what they are — hydraulic oil, coolant, and diesel all look different on the ground.
- Front linkage. Inspect boom, stick, and bucket for weld cracks. Confirm pins and retaining bolts are in place and greased. Check bucket teeth and adapters; a missing tooth ends up in a crusher.
- Fluids and hoses. With the machine level and the bucket on the ground, check engine oil, coolant, and hydraulic reservoir level against the sight glass. Inspect hoses for chafing, blistering, or seepage at fittings. A pinhole leak at working pressure is a fluid injection hazard — never run a hand along a suspect hose.
- Cab. Seat belt functional, glass and mirrors clean, cameras unobstructed, horn working, fire extinguisher in date, and no loose tools on the floor where they can foul the pedals or joysticks.
Excavator Controls: ISO vs SAE Joystick Patterns
This is where most confusion starts, and it is worth being precise. The ISO pattern is the most widely used worldwide and is standardised in ISO 10968 and SAE J1177. Under ISO, the left joystick handles swing (left and right) and the stick (out and in), while the right joystick handles the boom (up and down) and the bucket (curl and dump). The SAE pattern is identical except that boom and stick swap hands — the left joystick works the boom, the right works the stick.[2]
In both patterns the bucket behaves the same way: right joystick left curls the bucket closed, right joystick right dumps it. And in both, the boom raises when you pull back and lowers when you push forward.
Many machines include a pattern changer valve or an electronic selector that lets you switch between the two.[2] If you are learning, pick the pattern your fleet uses and stay on it. Alternating between ISO and SAE while you are still building muscle memory produces exactly the kind of reversed input that puts a bucket somewhere it shouldn’t be.
How to Drive an Excavator: Travel Controls and Tracking
Travel is controlled separately from the front linkage. Two pedals with detachable hand levers drive the left and right tracks independently: both forward for straight ahead, both back to reverse, one alone to turn, opposing inputs to counter-rotate on the spot. SAE J1177 defines the reference orientation for travel as idlers to the front and sprockets to the rear on crawler machines.[3]
The single most important thing to internalise: travel direction is referenced to the undercarriage, not to the cab. If you slew the house 180° and then push the travel controls forward, the machine moves toward what is now behind you. Before tracking, always look down at the undercarriage and confirm where the blade or the idlers actually are.
On slopes, track straight up and down the gradient, never across it, with the boom low and the bucket toward the uphill side. Control speed on uneven ground and avoid abrupt acceleration or braking, which causes track slippage.
How to Start an Excavator Correctly
Sit properly and fasten the seat belt. It is not just fall protection — it keeps you positioned so your inputs stay accurate when the machine vibrates or slews. Adjust the seat so both wrists rest naturally on the joystick consoles and both feet reach the pedals without stretching.
Confirm the hydraulic lockout lever is engaged before turning the key. Start the engine at low throttle and watch the gauges while it idles. Warm the hydraulic oil before working: cold oil is viscous, response is sluggish, and forcing full flow through a cold system is hard on pumps and seals.
Once oil temperature is up, release the lockout and cycle each function through its full range at low throttle — boom up and down, stick out and in, bucket curl and dump, slew each way, track a metre each direction. You are listening for cavitation and watching for cylinder drift.
How to Dig with an Excavator: The Four-Phase Digging Cycle
A dig cycle has four phases, and skilled operators blend them rather than executing them in sequence.
- Position: Square the tracks to the face you are digging. Digging over the side of the tracks is the least stable configuration there is — tipping resistance across the tracks is far lower than over the idlers or sprockets. Take your feet off the travel pedals once positioned so you cannot bump them mid-cycle.
- Load:Extend the stick to reach the far edge of the cut. Set the bucket teeth at a low angle to the ground, then draw the stick back toward the cab while curling the bucket. The stick does the pulling; the bucket does the filling. Beginners tend to over-curl early, which stalls the bucket in the ground and produces a half-full load.
- Swing and dump: Lift the boom just enough to clear the ground and the truck sideboard, and begin slewing while the boom is still rising. Slew and lift run on separate hydraulic circuits, so combining them costs nothing in time. Dump by opening the bucket, not by dropping the boom.
- Return: Swing back while lowering the boom and extending the stick, arriving at the face already positioned for the next pass. A tidy cycle in medium ground runs 15–20 seconds. Cutting three seconds per cycle is worth roughly 15% more production over a shift, which is why smoothness beats speed.
Work in even layers rather than gouging deep, and dig toward yourself in strips. When truck loading, spot the truck so the swing angle stays under about 45° — every extra degree of slew is dead time.
Trenching Safety and Excavation Ground Conditions
This is where excavation work stops being about machine control and becomes about geotechnics.
Excavation regulations apply to any man-made cut, cavity, trench, or depression in the earth’s surface, with a trench defined as an excavation deeper than it is wide and no more than 15 feet across.[4] Cave-ins are the leading cause of death in trenching work[5], and the widely referenced benchmark under 29 CFR 1926 Subpart P is that a protective system — sloping, benching, shoring, or shielding — becomes mandatory once an excavation reaches 5 feet in depth, unless it is cut entirely in stable rock or a competent person has examined the ground and found no cave-in hazard.[6] Safe egress must be available within 25 feet of lateral travel for anyone working inside the trench.[5]
From the seat, the practical rules are these. Keep the spoil pile well back from the edge — a minimum of 0.6 m under most codes, and further in loose or granular soil — because spoil surcharges the trench wall and triggers many collapses. Keep the tracks back from the crest as well; a commonly cited working guide is at least twice the track width.[1] Never position the machine so a track sits on the spoil pile.
Locate buried services before the first bucket goes in. Utility clearance drawings, cable location surveys, and hand-digging or vacuum excavation over known service corridors should all precede machine excavation.
Watch the ground you are standing on as much as the ground you are digging. On soft or waterlogged surfaces, lay steel plates or build a granular working platform before starting — recovering a bogged 30-tonne machine costs a day.[1] Prolonged heavy work in very high ambient temperatures also thins hydraulic oil and degrades lubrication, so build in cool-down stops.[1]
How to Backfill and Grade with an Excavator
Backfilling is the reverse of digging and rewards patience. Start from the far end of the spoil run and work back toward the machine, pushing material into the void with the back of the bucket. Do not undercut below the finished level while doing it — every centimetre you dig too deep must be refilled and recompacted.
Place backfill in layers rather than dumping the whole pile at once, and let the compaction crew work behind you. For final trimming, drag the flat of the bucket smoothly toward the cab using the stick while holding the boom steady. Grading with an excavator is purely a matter of coordinating two cylinders at constant speed — the hardest hydraulic skill to acquire and the one that most visibly separates experienced operators.
Excavator Shutdown and Parking Procedure
Park on level ground, clear of trench edges, traffic routes, and overhead hazards. Straighten the tracks in line with the house so the machine is ready to track off next shift. Lower the bucket flat to the ground — never leave the front suspended on hydraulic pressure, since cylinder drift over a long stop is normal and unpredictable.
Engage the hydraulic lockout, reduce to idle, and let the engine run before shutting off. A three-to-five minute idle period lets the hydraulic system relieve pressure and the engine cool; shutting down straight from working load accelerates seal ageing and, on turbocharged machines, bearing wear.[1] Switch off the master isolator, remove the key, and secure the cab.
Common Excavator Operating Mistakes to Avoid
A few patterns account for most damage on working fleets:
- Forcing the machine into unsuitable material. Ripping frozen ground, hard rock, or reinforced concrete with a standard digging bucket overloads the boom and stick, cracks welds, deforms pins, and spikes hydraulic pressure. Break it first, or fit a hammer.
- Slewing with the boom high and loaded. Raising the centre of gravity and then applying rotational force is the classic tip-over sequence. Keep loads low through the swing.
- Using the bucket as a lateral bulldozer. Side-loading the linkage — swinging the bucket sideways through material to push it — applies forces the boom was never designed to carry.
- Spinning tracks in place on hard surfaces. Counter-rotating on concrete or asphalt grinds track pins and bushings and accelerates sprocket wear. Use three-point turns instead.
- Skipping greasing intervals. Dry pins produce the knocking noise everyone ignores until the bore is oval and the pin has to be machined out.
- Blind-spot complacency. Mirrors and cameras do not cover everything. Sound the horn before slewing and before reversing, and use a banksman in any area with pedestrian traffic. Night work needs auxiliary lighting on the bucket and machine sides, not just the standard work lights.
- Carrying people or loose items. Riders on tracks or in the bucket, and tools stacked in the cab where they can jam a control lever, are both routine causes of serious incidents.
Best Practices for Efficient Excavator Operation
Seat time is the only path to proficiency, but structured practice beats random practice. Set repeatable exercises: dig a trench to a string line and hold the grade; load a truck to level in a fixed number of passes; move a bucket of sand across the machine without spilling. Track your cycle time on a familiar task and reduce it by smoothing transitions rather than adding throttle.
Match the bucket to the job. A wide bucket in dense material simply stalls; a narrow bucket in light soil wastes capacity. Keep track tension within specification, since slack tracks derail and over-tight tracks accelerate pin and bushing wear.
Learn the specific machine you run. Read the operator’s manual for lift chart limits, service intervals, and model-specific slew and travel restrictions. A 5-tonne compact machine and a 50-tonne excavator share a control layout and almost nothing else in terms of stability envelope, reach, and ground bearing pressure.
Frequently Asked Questions About Operating an Excavator
- How long does it take to learn to operate an excavator? Basic competence on straightforward tasks generally comes within one to three months of consistent operation. Confident handling of complex conditions — confined sites, slopes, precision grading, work near live services — typically takes six to twelve months.[1]
- Can you operate an excavator without certification? No. Operating uncertified is unlawful and uninsurable, and in the event of an incident it transfers liability directly onto both operator and employer.[1]
- Should I learn ISO or SAE controls? ISO, unless your employer’s fleet is configured otherwise. It is the dominant pattern globally.[2]
- What is the difference between joystick and lever control? Joysticks transmit inputs hydraulically or electronically and allow compound movements — boom and bucket simultaneously, for example — which is why excavators use them. Mechanical lever linkages require more physical effort and generally support one movement at a time, which is why they survive mainly on simpler machinery.[1]
- Is it safe to dig over the side of the tracks? No. Always square the undercarriage to the working face. Lateral digging dramatically reduces stability and is a common cause of tip-overs.
References
- “How to Operate an Excavator: Essential Skills and Safety Tips.” SANY Group, 2 April 2026. https://www.sanyglobal.com/blog/how-to-operate-excavator/
- “Excavator controls.” Wikipedia. https://en.wikipedia.org/wiki/Excavator_controls
- SAE International. J1177 — Hydraulic Excavator Operator Controls. https://www.sae.org/standards/content/j1177_200612/
- “Excavation and Trenching Safety: OSHA Subpart P Requirements.” SafetyRegulatory.com, 2026. https://safetyregulatory.com/guides/excavation-trenching-osha-guide/
- “Navigating OSHA 1926 Subpart P for Construction Safety.” Kyro, 2025. https://kyro.ai/blog/navigating-osha-1926-subpart-p-for-construction-safety-excavation-and-trenching-guidelines
- Occupational Safety and Health Administration. Trenching and Excavation Safety, OSHA 2226-10R. https://www.osha.gov/sites/default/files/publications/OSHA2226.pdf
- Occupational Safety and Health Administration. 29 CFR 1926 Subpart P — Excavations. https://www.ecfr.gov/current/title-29/subtitle-B/chapter-XVII/part-1926/subpart-P